Rib Forming
These photos and captions are listed in reverse chronological order so you don't have to scroll through pictures you've already seen just to check out the new stuff. If this is your first visit here, start at the bottom!
13 February 1999
 Hole flanging tool. Thanks go to Tom Decker for sending me photos of his flanging tool. I wouldn't have thought of this myself and would still be cursing while trying to make flanging dies without the benefit of a lathe! Tool is made from scrap broom handle, 1/8" aluminum sheet, two 1/4" bolts, nuts and washers, and two Gulf Bearing R-4-ADDHA1 ball bearings.
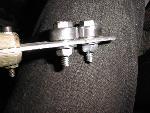 Close-up of the business end of the flanging tool. Note the rounded edges of the ball bearings. This was done by placing the bearing on the bolt then holding against the belt sander and allowing it to spin as it was sanded. This rounded shoulder is necessary to prevent scratching the inside corner of the flange, and to provide a nice radius to the bend. I found this out the hard way after making the first flange on the S6 nose rib. It scratched pretty badly. I may have to make a new part, but I will get the opinion from my local EAA chapter before doing so. Also note the "trench" that is cut between the bearings. The aluminum sheet I used for this tool is very soft and the 6061-T6 cuts it like butter! I'll need to replace this with steel or fiberglass circuit board soon.
 Hole flanging tool in use.
 Hole flanging tool in use.
 Hole before flanging.
 Same rib five minutes later.
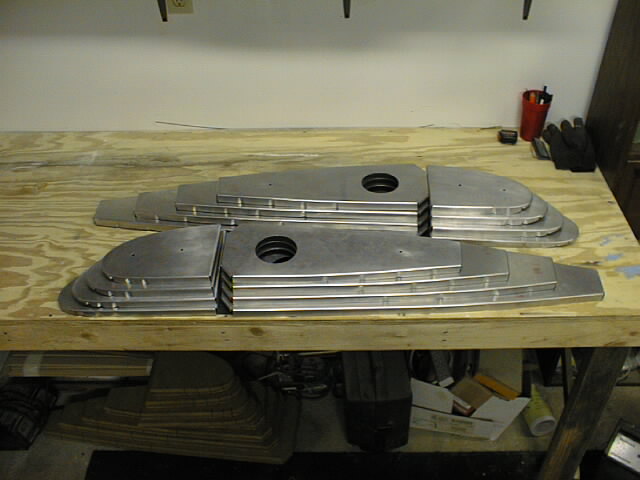
 Pile-o-ribs. OB wing ribs are now completely finished. Time to make center ribs.
09 February 1999
 Group shot of all outboard wing ribs after cutting lightening holes. Note the stack of "holes". It's surprising how much this stack weighs! I didn't put them on the scales, but my "calibrated hand" says almost one pound.
 Another shot of the ribs all snuggled together on the workbench. Next project: Making a flanging tool and flanging the holes. Stay tuned!
31 January 1999
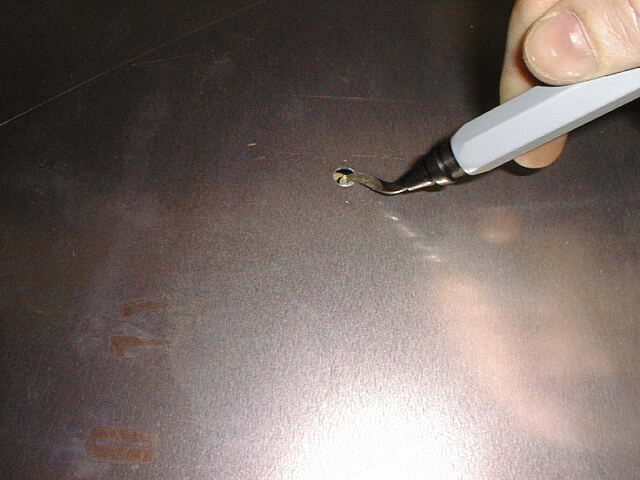
 Here is a swivel-head deburring tool in use. Works great, and is $7.48 well spent!
 That's me, preparing to use the circle cutter for the first time. If you're wondering what that strange object is on the shelf beyond my head, it's the first half of a fuselage mold for a scale RC model airplane. The first person that can correctly identify the aircraft type wins a ride in my Zodiac when it is finished. :^) Send me an email with your guess. Oh, and you guys that hang around my workshop aren't eligible; you already know what it is.
 This is what the circle cutter does. The only problem I encountered was a tendency for the blade to "grab" as the cut is almost complete, no matter how gently you are feeding the cut. I'll buy a can of Tap Magic for aluminum before cutting the next hole to see if that will help.
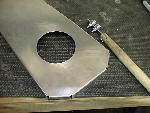
 The finished cut.
27 January 1999
 This photo shows (rather poorly due to the reflection of the workbench) how bowed a rib is after the flanges are formed on the forming block. Now that I think about it, I would probably be bowed too if I'd just been beaten with a hammer for 15 minutes. :^)
 Like magic, it's straight after a few squeezes from the fluting pliers.
 How's this for a matched pair of S7 rear ribs? Total time to form and flute each rib (from the already-cut blank of course) was 17 minutes. Who says making ribs takes a long time?
 Matched set (left and right) of S7 outboard wing ribs. I probably won't post any more rib forming pictures until all outboard wing ribs are completed, since it's just going to be more of the same. The next new section will be on making the lightening holes in the ribs. Stay tuned!
24 January 1999
 These are the pieces I used to make my own set of rib flange fluting pliers. Two small pieces of 1/8" aluminum and some short pieces of 1/4" steel rod, flattened on one side and smoothly rounded on the end. These were glued onto the aluminum, which was then glued onto the Vice Grip pliers using JB Weld.
 The finished result. This took only about an hour, not including cure time for the JB Weld of course.
 Do they work? You be the judge.
 This is what my first attempt at forming a nose rib looked like right after being popped off of the forming block. At this point I thought it was ruined! I didn't know how in the heck I was supposed to make it look like the "store bought" ribs do.
 After some careful work with some smooth-jaw duckbill pliers and my home-made fluting pliers the ugly duckling is tranformed into a beautiful swan. Or...a nose rib. Whatever. :^)
 Here's the same rib station for the other wing on the forming block. Yep, it's ugly too. First one in the background.
 The finished pair, back to back. Neato.
 This shows the simple method I used to mark the 20mm flange around the forming block. It's just a 1/8" balsa disk with a hole for the Sharpie. Works fine.
 1/4" holes drilled to provide the required 1/8" radius for the flange corners.
23 January 1999
 Stack of rough-cut rib blanks for both outboard wing panels. This represents about 1 hour of hand snipping.
 Two rough-cut blanks clamped between the forming blocks prior to marking the 20mm flange.
 That's me draw-filing the rib blanks to final shape after snipping. That's Brian's finger over the lower left part of the camera lens. It's hard to find good help these days. :^)
 Rib blanks after filing.
 Finished rib blanks. Time to beat hell out of them with a hammer now.
22 January 1999
 Here's what a 4x12 sheet of .025 6061-T6 looks like when rolled. Doesn't look much like an airplane at this point, does it?
 Aluminum sheet unrolled in living room, ready to mark out the rib blanks. Note Onyx the Quality Control inspector giving the sheet a close look to assure it meets specifications.
 Here is the layout that I came up with using CAD. Very little scrap left over. This file is available for download in .dxf format here.
 Here I am trimming off the unused portion of the sheet. Note Onyx keeping a close eye on the procedure from the comfort of the chair behind me. She's a very good supervisor!
 The very first part for the Zodiac! Rib blank S6 rough cut. That's my old friend (and Gulf War veteran) Brian Burghart sitting in the chair.


 Hole flanging tool. Thanks go to Tom Decker for sending me photos of his flanging tool. I wouldn't have thought of this myself and would still be cursing while trying to make flanging dies without the benefit of a lathe! Tool is made from scrap broom handle, 1/8" aluminum sheet, two 1/4" bolts, nuts and washers, and two Gulf Bearing R-4-ADDHA1 ball bearings.